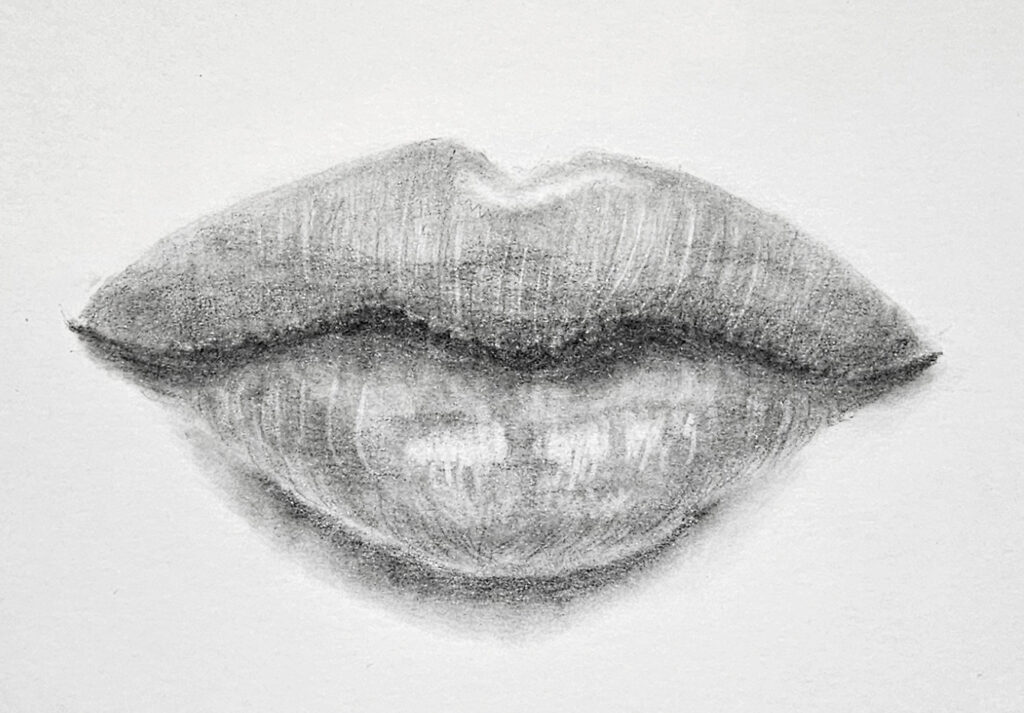
I decided to draw some lips with graphite pencils for the TADD art prompt of “Lips” this week. I’ve always said “I can’t draw lips”…and hands and ears for that matter! So I watched a few lessons online and found my courage! I’m so happy that I tried this. Sometimes when we draw faces, we think that lips will be a walk in the park…not at all! This drawing took me a good forty-five minutes at least! These pouty lips aren’t mine though! ☺
My List of Art Lessons on YouTube
On my YouTube channel Rain Frances Art, I offer drawing and painting lessons. Some are time-lapsed and there are shorts there, but the majority now are real-time. Click on this link and it will bring you to my index page where you can browse through over one hundred drawing and painting lessons!
The Supplies I Used To Draw “My” Lips
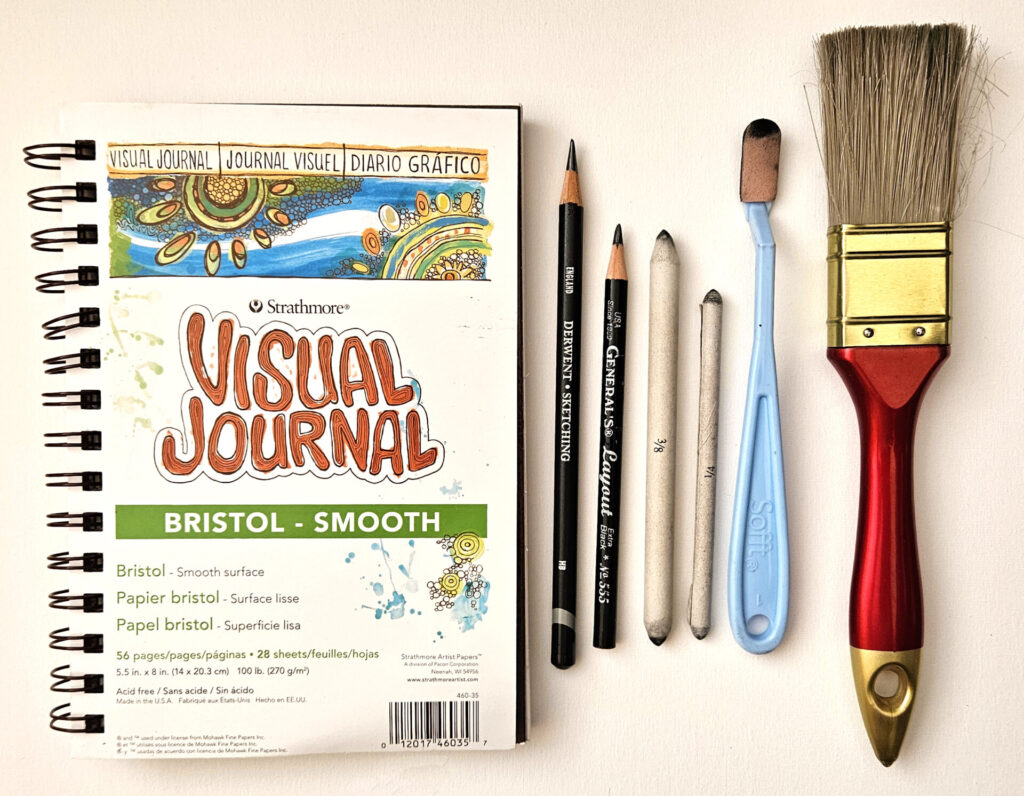
These are the supplies I used to draw my pouty lips! Bristol Smooth paper is really good for graphite art. I used two graphite pencils: HB and 6B. I just needed a lighter shade of black (HB) and a darker shade of black (6B). My well-used blending stumps came in handy, as did my foam-tipped blender. The dollar-store 1-inch paintbrush is for dusting off my page, I love using it!
My Drawing Process
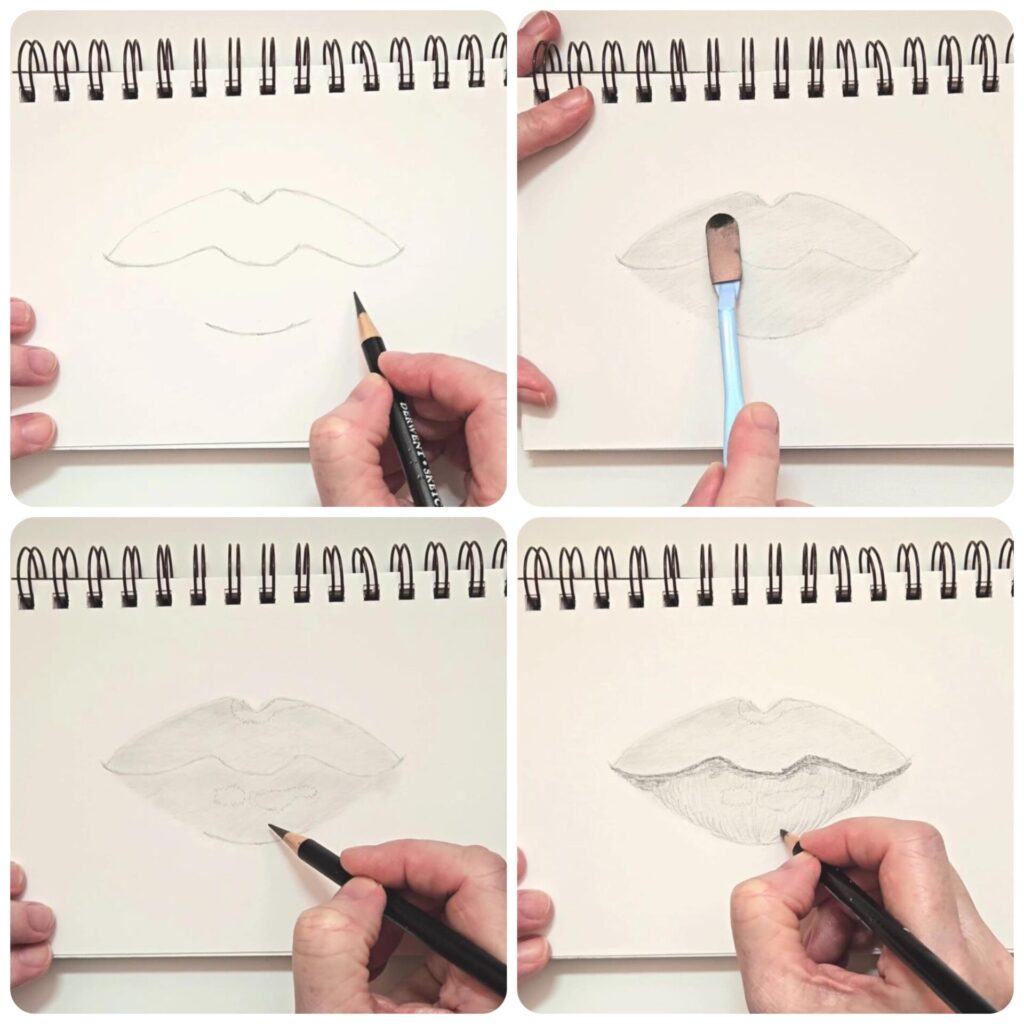
I started by drawing a rough outline of the lips, adding some HB shading and blending with my Sofft foam-tipped blender. Foam blenders are amazing for blending graphite. Outlining the areas where I wanted to highlight came next. Then some contour-line shading on the lower lip. I also darkened the area where the lips meet using my 6B pencil.
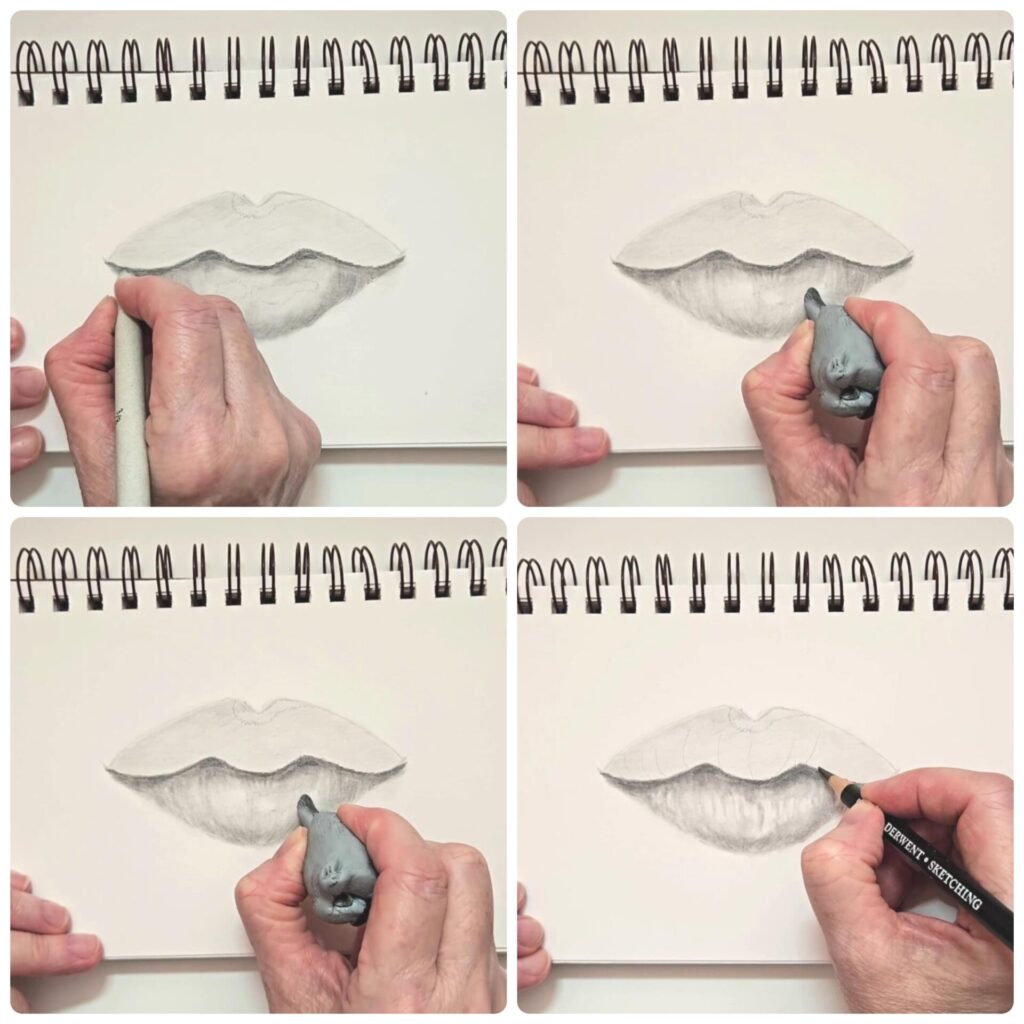
Using my blending stump, I blended the dark areas to soften them. I used my kneaded eraser to remove some of the graphite to create the highlights on the lower lip. Then I moved on to the upper lip by creating contour lines, following the contour of the lips themselves. For the contour lines, I used my HB graphite pencil.
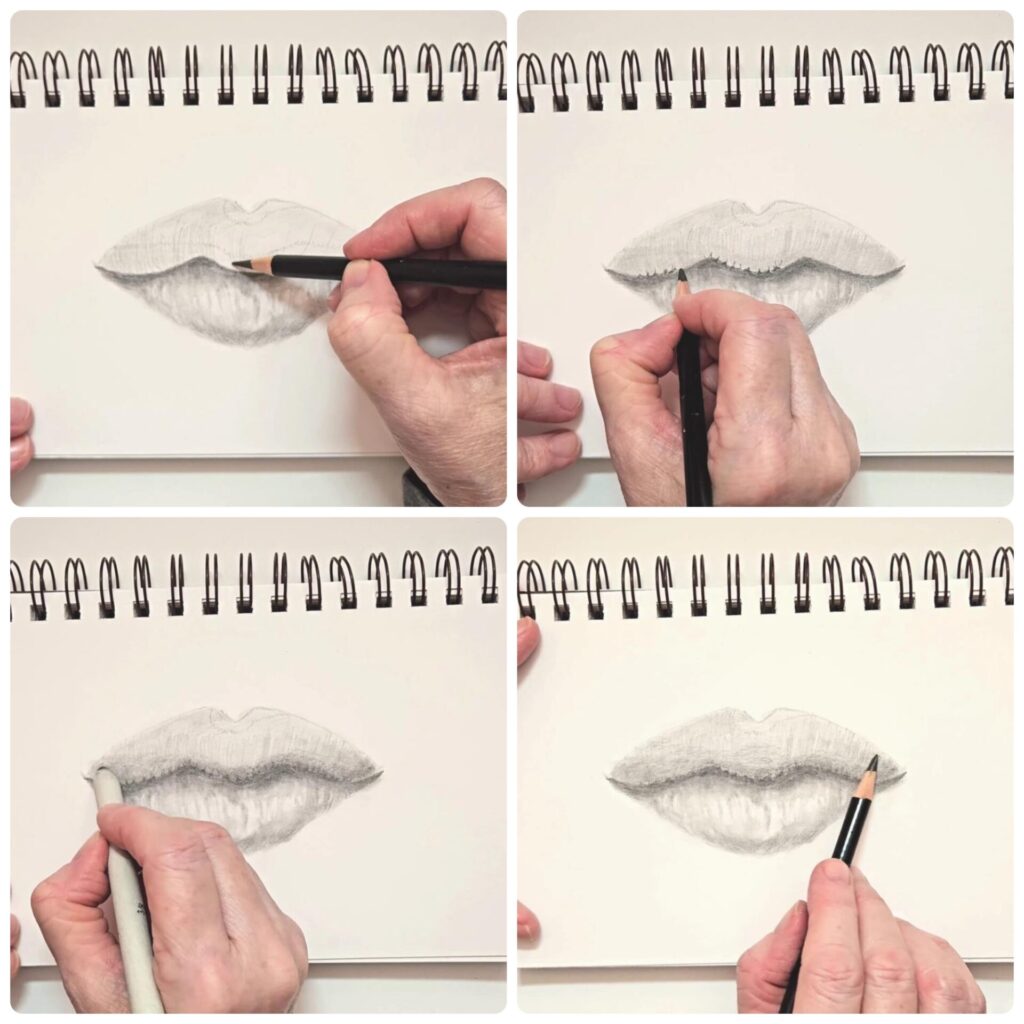
I wanted my lips to look realistic, and since the light source was from above, I created shadows on the lower upper lip and in between where the lips meet. I used my 6B pencil for all of the dark shadows and for creating grooves on the lower part of the upper lip. Switching to my HB pencil, I continued to shade the upper lip using contour lines.
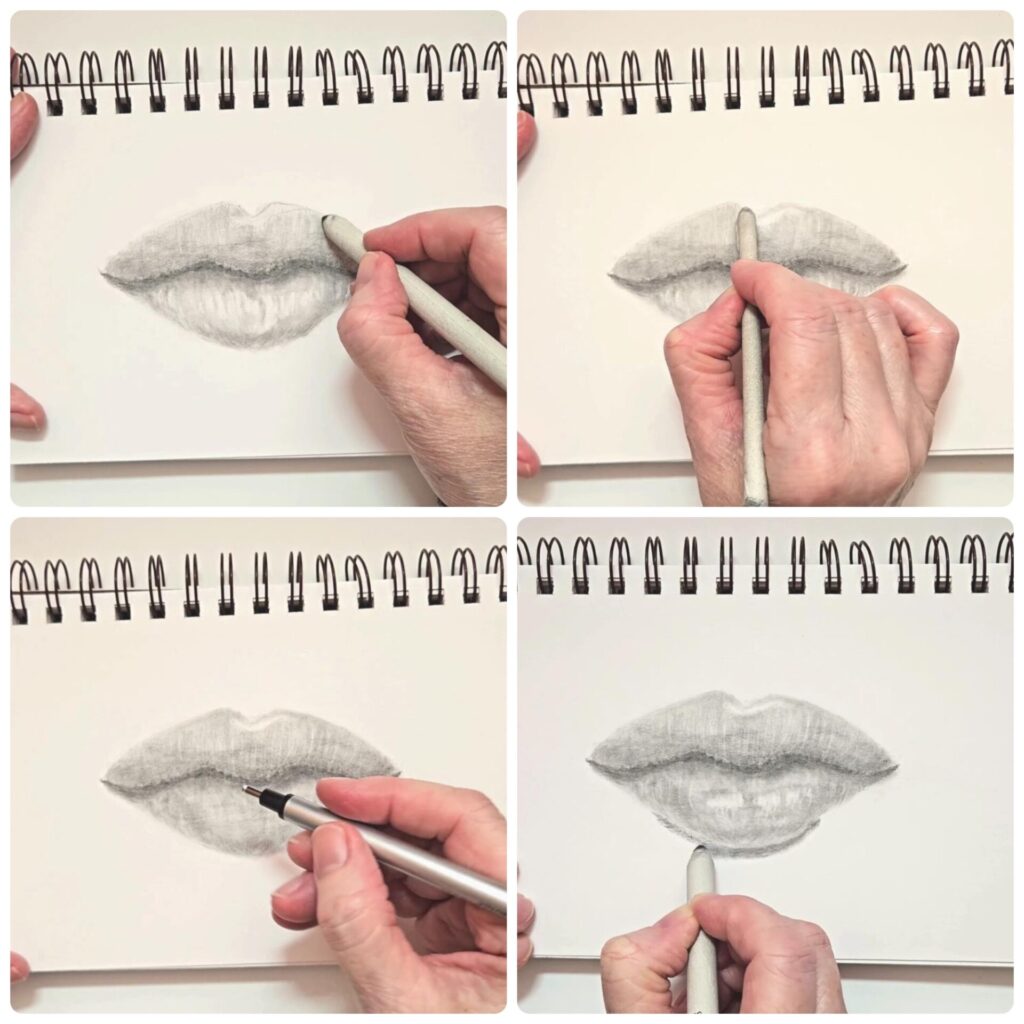
Using a few different blending stumps, I tried to soften the lips and the contour lines that I made. A nifty little tool is the Tombo Mono eraser. It’s a retractable eraser and it’s got a tiny tip which makes for great highlighting. After some finishing touches and details, I added a shadow under the lips with my 6B pencil and blended it with the blending stump.

This was a fun study to do and I learned a lot about shading and highlighting. Now I know how to draw lips, another bit of expertise that I can add to my art arsenal of goodies!
Real-Time Art Lesson and Supply List
If you’d like to try drawing my lips, I have the real-time art lesson on my YouTube channel Rain Frances Art. The video is about forty-five minutes. Here are the supplies you’ll need:
- Drawing paper, I used Visual Journal “Bristol Smooth” drawing paper, 5.5” x 8”
- Graphite pencils: HB, 6B (HB is a must, but you could use a 4B or 5B for the shading if you don’t have a 6B)
- Blenders: I used a ¼” and a 3/8” blending stump and my Sofft brand foam-tipped blender
- Erasers: Kneaded eraser, I also used my Tombo Mono eraser
Let me know in the comments if you tried my Graphite Lips drawing tutorial!





Great tutoria, Sis. Lips seem to baffle some people but you show how easy it is.
Thank you! I think it’s because people rush through drawing them, I used to do that and they all looked cartoonish!