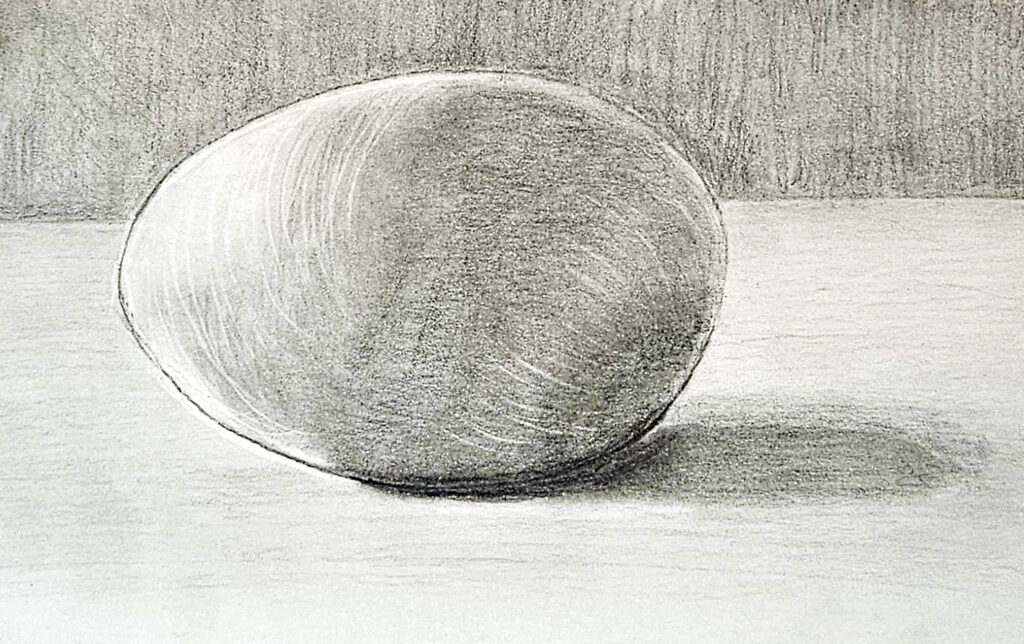
Can you draw still life? Do you think it’s easy to draw an egg? Well….my friends, I had quite a time of it! I admit still life isn’t my forté! But since this week’s art date prompt is eggs, I figured why not?
My List of Art Lessons on YouTube
On my YouTube channel Rain Frances Art, I offer drawing and painting lessons. Some are time-lapsed and there are shorts there, but the majority now are real-time. Click on this link and it will bring you to my index page where you can browse through over one hundred drawing and painting lessons!
The Supplies I Used To Draw My Graphite Egg
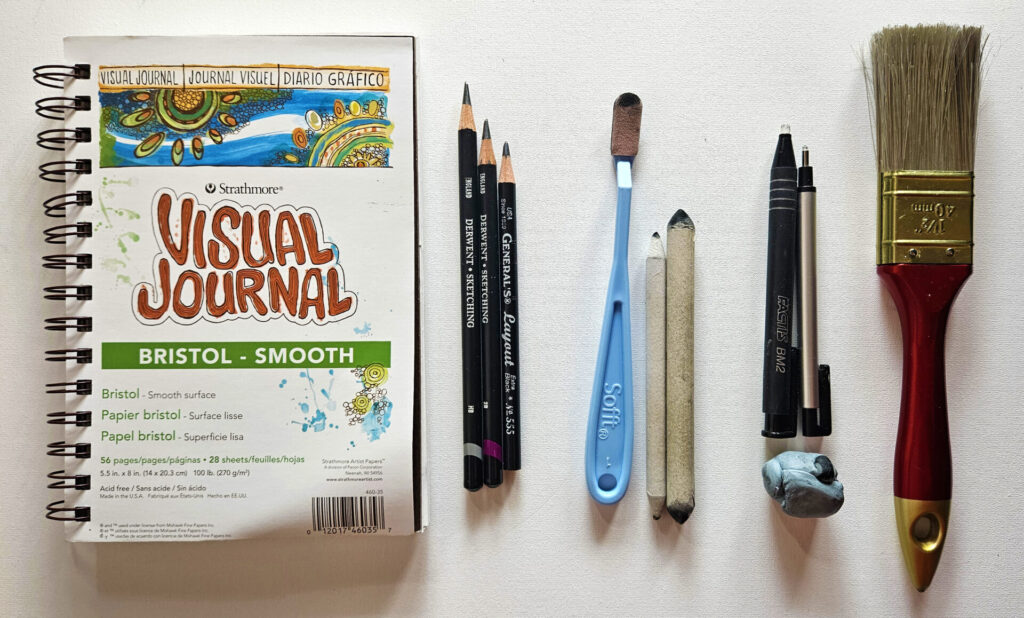
This was a study – which basically means we are practicing and learning. So for my study, I used a nice smooth drawing paper, Bristol Smooth. I used HB, 2B, and 6B graphite pencils. For blending, I used my Sofft brand foam-tipped blender and a few blending stumps. For highlighting, I used a few mechanical erasers and a kneaded eraser. And I always have my old paintbrush that I use to dust off my page.
My Drawing Process
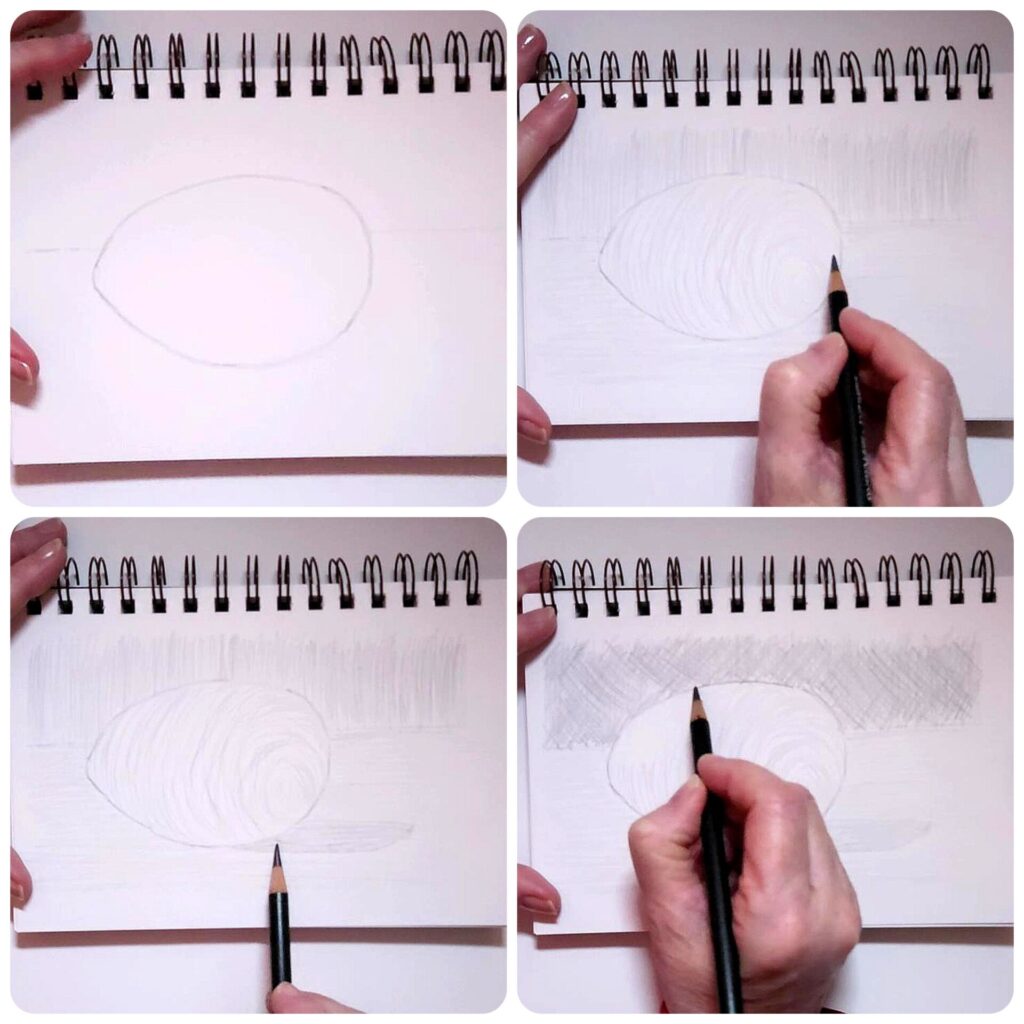
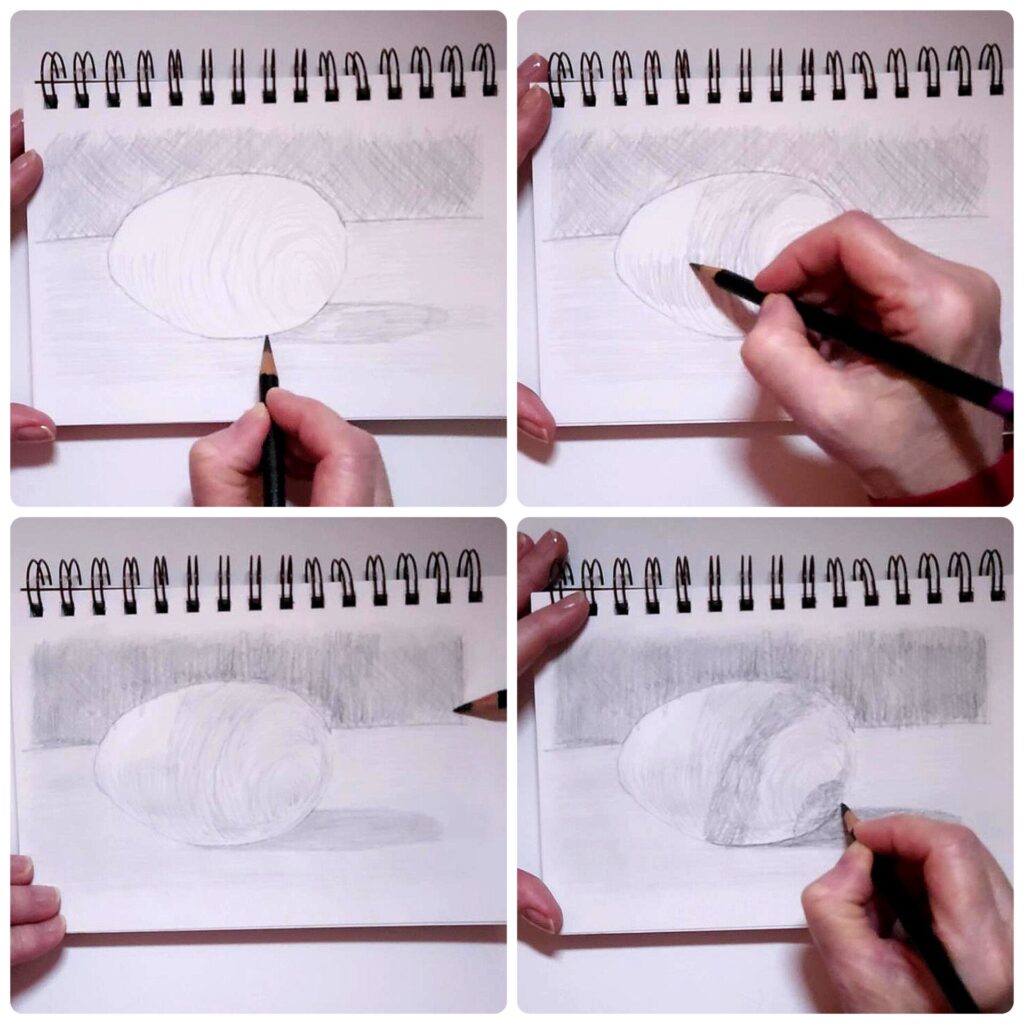
I started by drawing the egg shape – I actually made a quick stencil on tracing paper (click the link to download the stencil); I used it to help me outline the egg shape. I admit it…I’m not good at drawing an egg! I shaded the wall area with vertical lines, the table area with horizontal lines, and the egg with contour lines. I added a quick shadow underneath the egg and darkened the outline.
I was really winging this! I had a reference photo on my computer as I drew this. It was a photo of an egg on a table. I was specifically watching out for directional shading; as well as shadows and highlights.
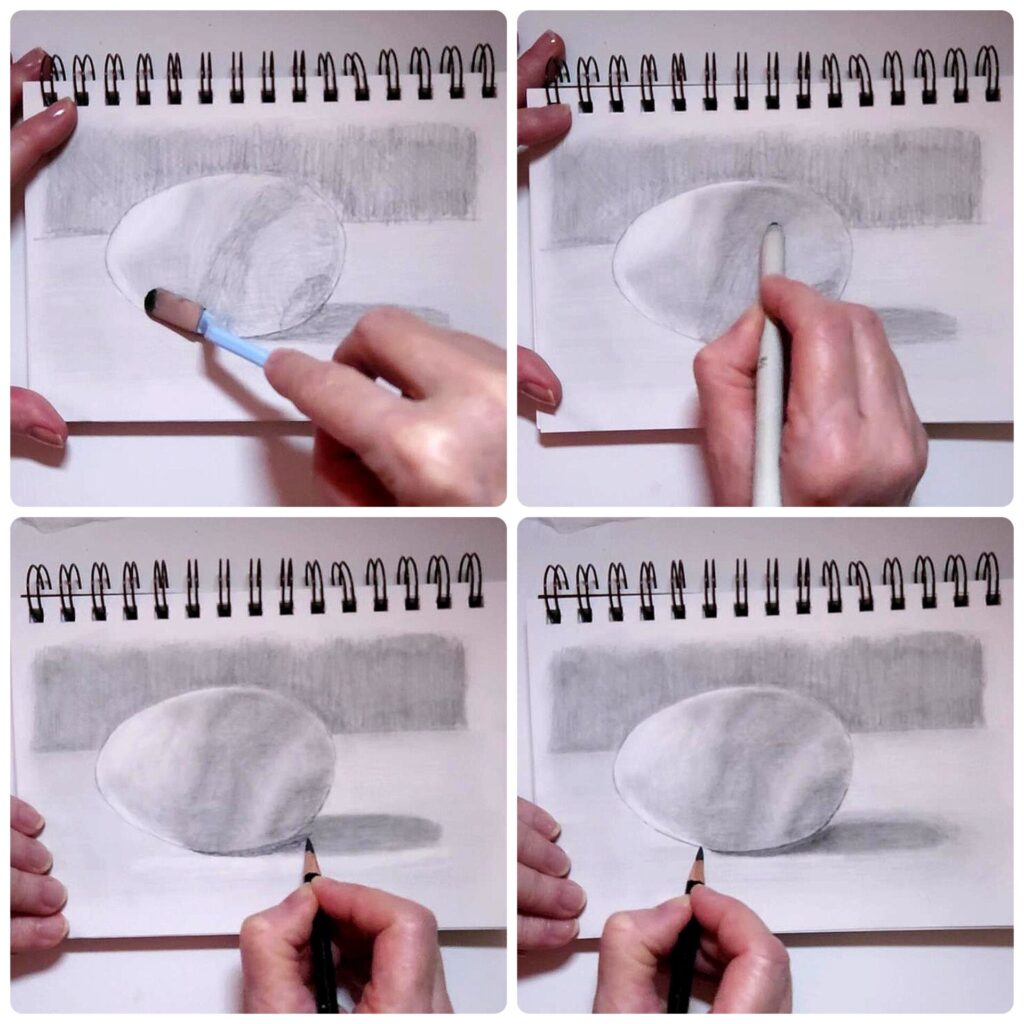
I used my foam-tipped blender and a blending stump to blend the areas as best as I could. I also darkened up the outline and the shadow area under the egg.
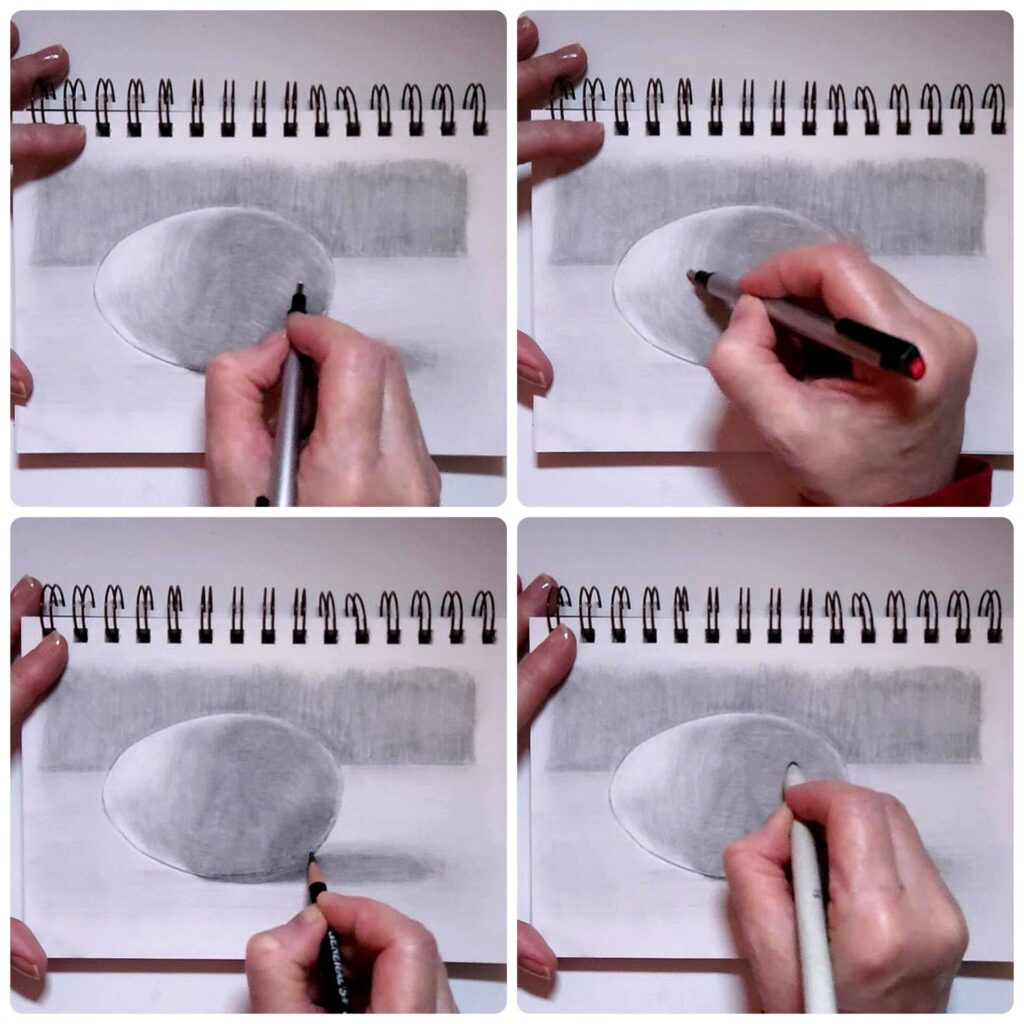
I used my fine-tipped eraser to add contour highlighting where I thought it was needed. I finished up by making sure the outline of the egg was visible and all areas were well blended. Now, this is a quick description of how I drew this egg! If you’d like to try drawing it, why not check out my real-time video art lesson below?
Would you like a weekly email to notify you of new posts on the blog? Just click below:

Real-Time Art Lesson and Supply List
If you’d like to try drawing this egg, why not check out my real-time art lesson? It’s about a 60-minute lesson and it’s up on my YouTube channel.
Here are the supplies you’ll need:
- Drawing paper – I used a Visual Journal Bristol Smooth drawing pad (5.5″ x 8″)
- Graphite Pencils: HB, 2B, 6B
- Erasers: Tombo Mono Mechanical Eraser, Factis BM2 Mechanical Eraser, kneaded eraser
- Blenders: SOFFT foam-tipped blender, blending stumps
- Dollar Store paintbrush to wipe dust and eraser bits off my canvas
Let me know in the comments if you tried my Graphite Pencil Egg Drawing!